


How to build a PC
Source: itpro.co.uk
December 22, 2020
In this challenging time, it is more important than ever to have ways of connecting with each other. One of the best tools for accomplishing this task is with a personal computer or PC.To build a PC you will need to obtain a few parts of varying costs and importance.
- Motherboard – the nervous system of a PC, required for even the most basic connection. These cost between $50 and $300 for most builds.
- CPU – the unit that lets your device interact with other components and systems in the computer. A CPU can cost between $100 and $900.
- Graphics – either dedicated or attached to the CPU, this circuit board lets you display work to a screen. Graphics can be included with certain CPUs or can be bought as cards from $60 to more than $1,400.
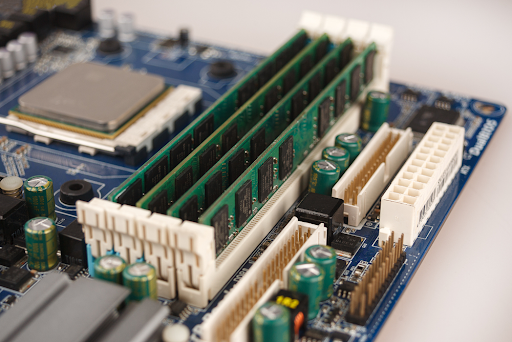
- RAM – the short term memory of a PC that lets you store non-permanent data like a Google search. RAM costs about $30 for cheap sticks and about $150 for higher quality sticks.
- Memory – lets you permanently store something. Depending on the type of memory and capacity, costs vary between less than $100 and upwards of $500.
- PSU – the power supply that gives energy to all other components. A decent PSU can cost about $60 but can go well above $120.
- Case – holds all of your components. Can cost nothing at all or upwards of $250 dollars for high-end cases.
The only tools necessary are a screwdriver and a flashlight.
Some high-quality vendors for the aforementioned parts are Corsair, Nvidia, AMD, Intel and MSI. One thing to note is that you shouldn’t cheap out, because any single system failure or limitation affects all other components.
- First (or optionally at step 4), you need to attach your motherboard to the case. Most likely your motherboard and case will come with screws and standoffs to mount the motherboard. Get a screwdriver and line up your motherboard with the standoff one at a time. Then, screw it in tightly.
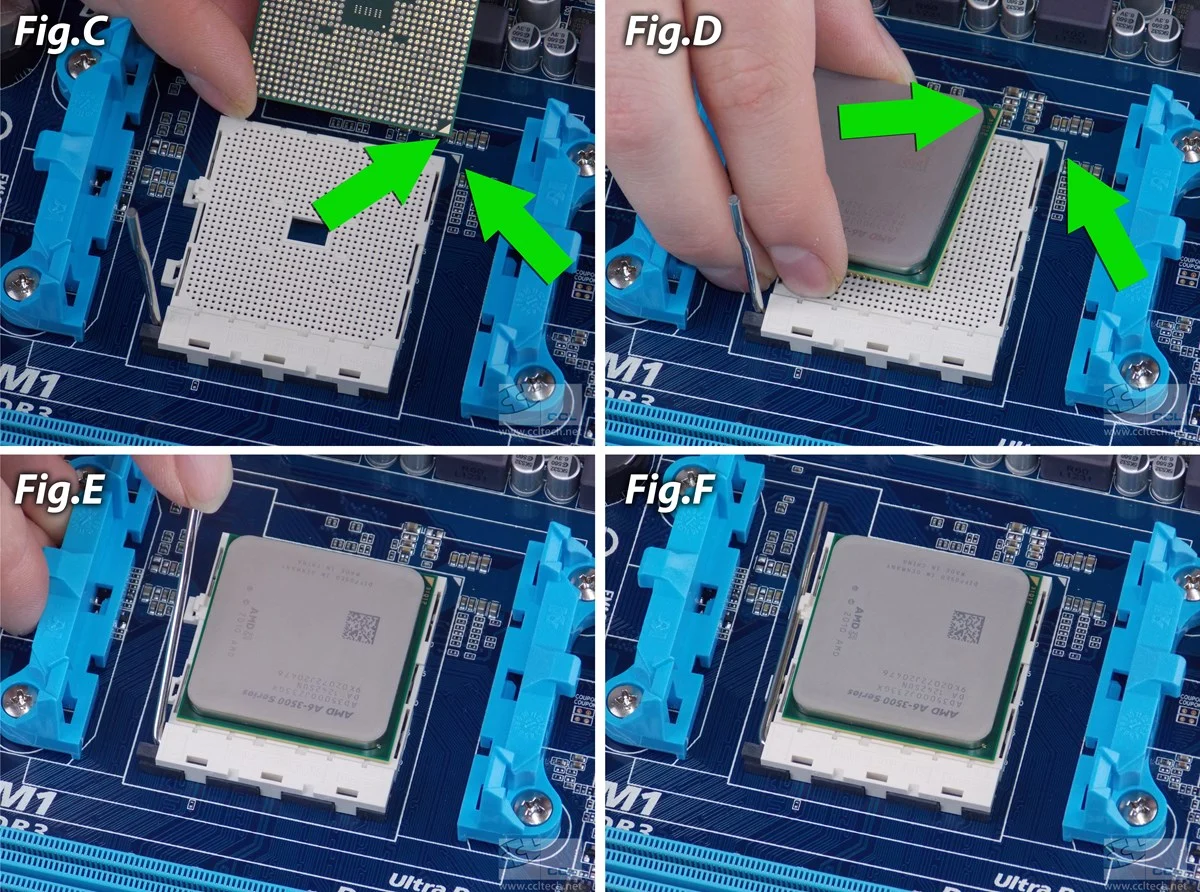
- Next, grab your CPU and affix it into the dedicated CPU slot on the motherboard. That location will be a small square shape near the center with either small slots, or a large number of small pins. In the top right corner of your CPU, there will be a small triangle which you need to line up with the small marker on the CPU slot. When you press it in, firmly hold it down for a second. Then you can put the cover over it if your motherboard has one. At this point, attach your cooler if you have one. Some CPUs ship with coolers. Connect the small three or four-pin connector to the motherboard at a section labeled “fan” near the CPU slot on the motherboard.
3. Connect your sticks of RAM. Next to the CPU slot, there will be generally four lanes of space for RAM. They are labeled from left to right and from one to four on most modern motherboards. If you have only one stick, positioning it does not matter. However, if you have two or more, then you must keep one channel between them. For example, place one stick in slot one and the other in slot three.
4. At this point place your motherboard into the case.
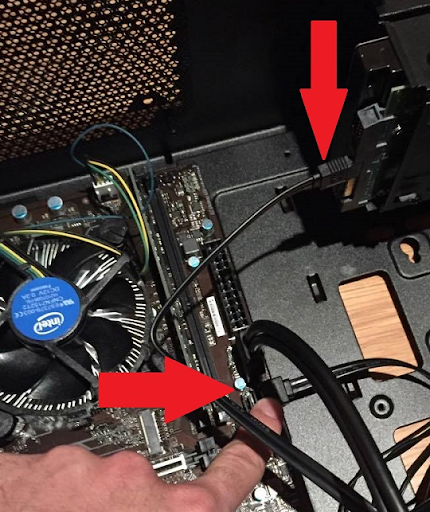
5. Next, connect your PSU into the case at its designated spot, usually at the bottom or in a small compartment. If you bought a modular power supply with many optional cords to attach or a semi-modular power supply with a mixture of permanently attached cords and optional cords, then connect the cords you require. If you bought a non-modular PSU, you must manage the unused cords. At a bare minimum, connect the 24-pin connector to the motherboard and connect the eight-pin connector to the slot near the CPU. If you bought a graphics card that has a power supply connection, then connect this as well
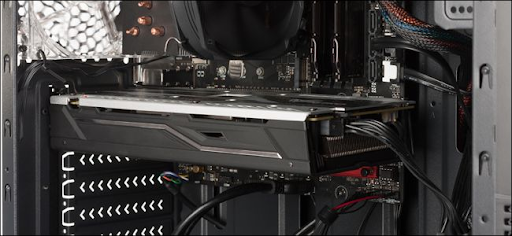
6. Connect the GPU or graphics to the motherboard at a PCI-E slot. This will look similar to the RAM channels, but it is usually located below the CPU. It will likely go in sideways with any connection ports going towards an opening in the case. Not every build will need a dedicated card due to integrated CPU graphics, but if you do have a designated card, connect the necessary power.
7. Connect memory. If you have a hard drive you need to place this somewhere in your case and connect a SATA cord and sometimes another power supply cord depending on the architecture. Then, connect this SATA cord to the SATA connection near one end of the motherboard. If you have an SSD or M.2 memory device, connect this to the motherboard directly at the M.2 site if it has a connection. Slide in the connector end and press it down before securing it with a tiny screw that will be most likely on the motherboard already. If it does not have an M.2 connection, then place the SSD somewhere else and connect it through SATA and PSU connections similar to the hard drive.
8. If you have optional fans or lights, connect their pin connectors to the motherboard at the labeled sections. You also have to connect the power button of the case to a similar section.
One last thing to note is the compatibility of parts. Certain motherboards have a special classification called a chipset. This determines what architecture of CPU it holds, being AMD or Intel. Intel CPUs have pins on the motherboard only or partially while AMD chipsets have pins only on the CPU.
With these basic instructions and parts, you can successfully build a computer.
An excellent website for locating and buying parts, checking compatibility and seeing reviews is pcpartpicker.com